
Proxmox VE

Homelab Build: Learning Networking, Self-Hosting, and Linux
Introduction: My Homelab
My journey into the world of homelabbing started with a desire to expand my technical skills beyond theoretical knowledge. I wanted hands-on experience in networking (VLANS, subnets, network segmentation), self-hosting services (Pi-hole, Nextcloud, Jellyfin, Home Assistant, Docker Swarm), and virtual machine management for development environments. More importantly, I wanted to understand how containerisation and orchestration tools like Docker, Podman, and Kubernetes are utilised in enterprise environments.
After completing my CompTIA Linux+ certification, I was motivated to explore Linux further, particularly in container orchestration. Building a homelab was a means of experimentation and a strategic decision to simulate real-world scenarios and build practical skills.
In this article, I’ll detail the hardware and software selections I made, explain my rationale behind each decision, and provide insights into the learning experiences along the way.
Objectives of My Homelab:
I aimed to:
- Learn Networking: VLANs, subnets, firewalling, and secure network segmentation.
- Practice Virtualisation: Running VMs and containers efficiently using Proxmox VE.
- Explore Container Orchestration: Docker, Podman, Kubernetes (enterprise-focused solutions).
- Host Personal Services: Self-host solutions such as Pi-hole, Nextcloud, Jellyfin, Home Assistant.
- Test and Deploy Small AI/ML Workloads: GPU acceleration and virtualisation for experimentation with AI.
Networking and Firewall Setup
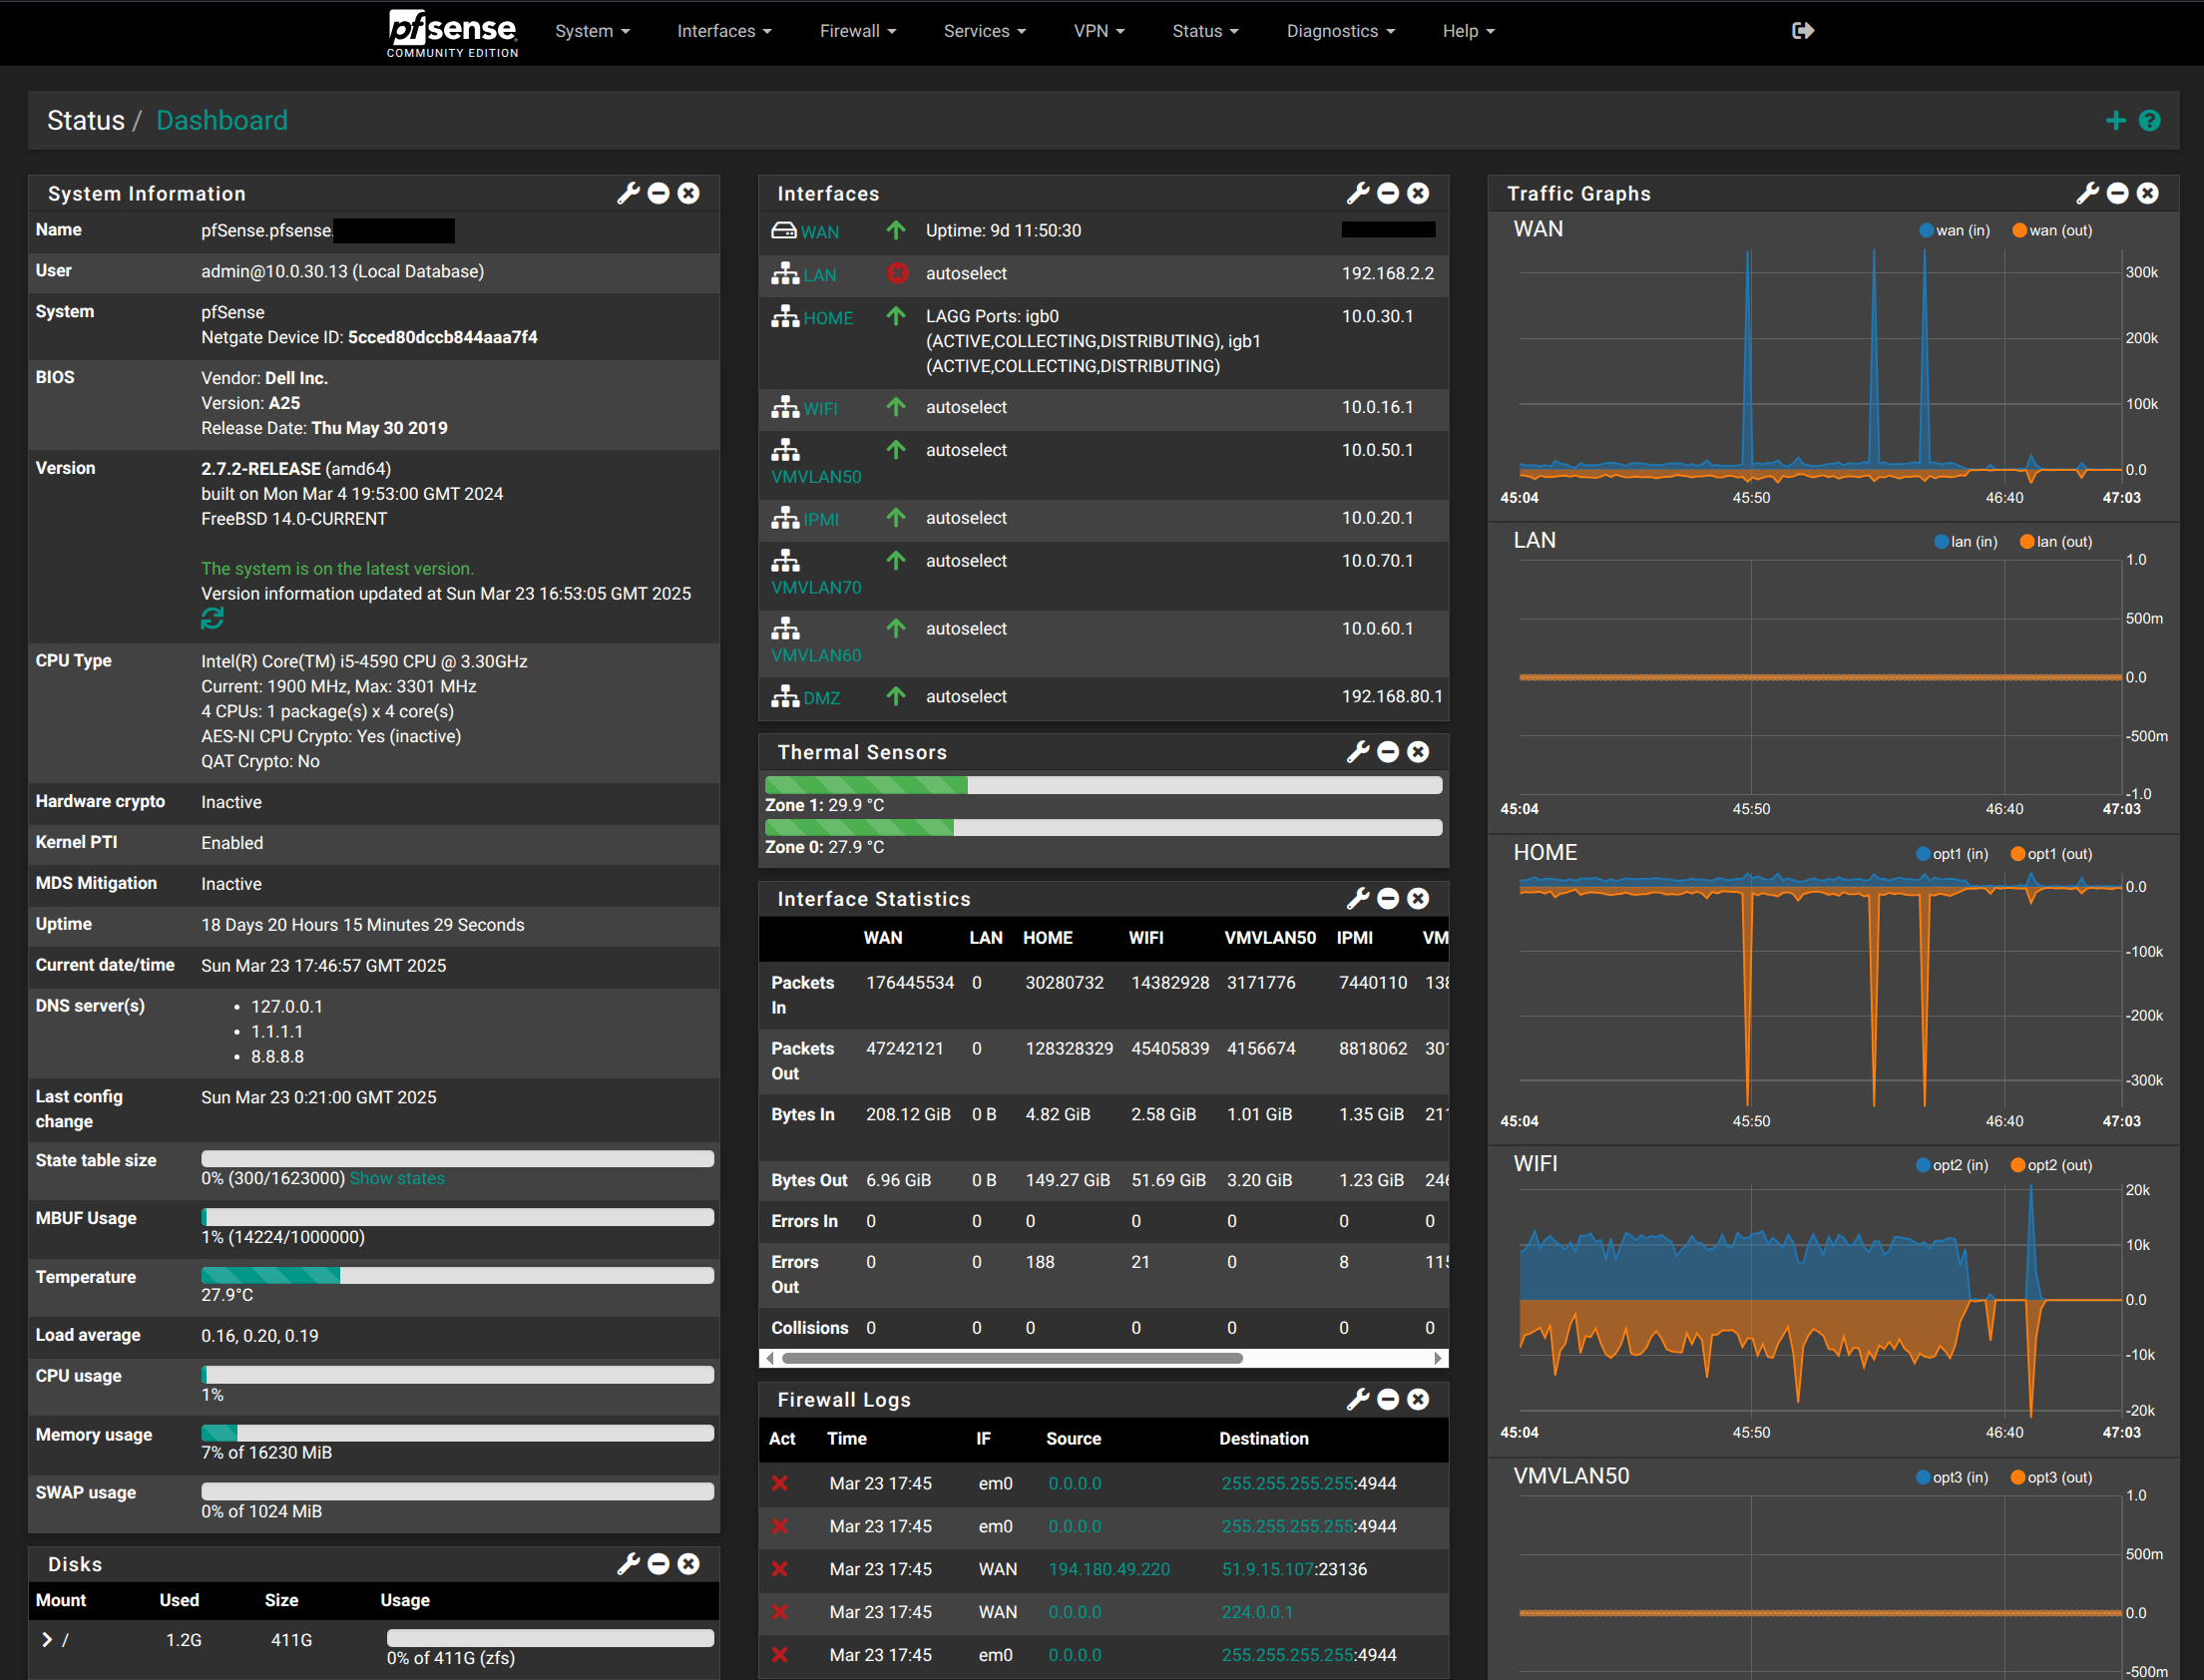
A crucial component of my homelab was the network infrastructure. I needed to create a segmented, secure network to simulate enterprise-level setups. For this, I used pfSense Community Edition as my firewall/router. Setting up pfSense and segmenting my home network into VLANs was an invaluable learning experience that provided hands-on knowledge in:
- VLAN configuration
- Subnetting
- Network segmentation for security
- DHCP and DNS management
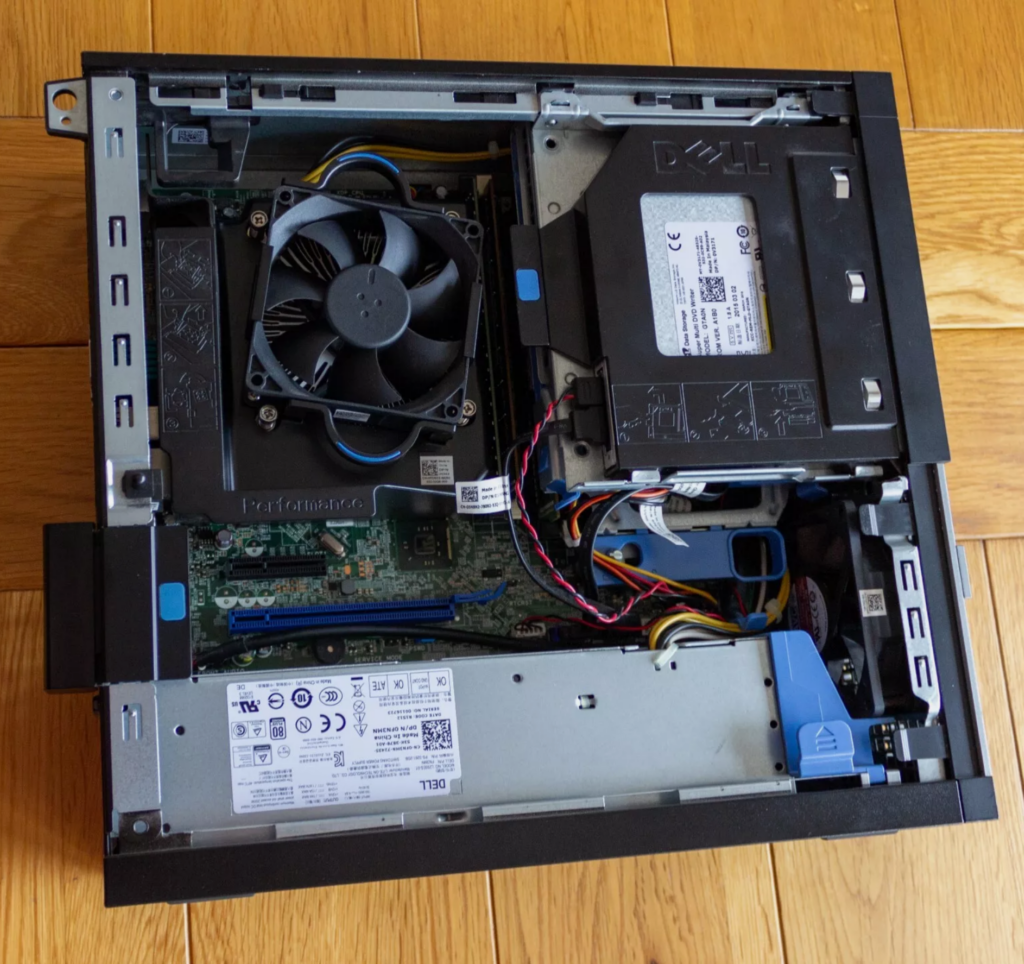
To host pfSense, I purchased a used Dell Optiplex 9020 SFF Desktop with the following specs:
- Intel Core i5-4590
- 250GB SSD
- 16GB RAM
I chose a dedicated machine instead of virtualising pfSense on Proxmox to avoid losing internet access during Proxmox reboots. This separation provided flexibility and reliability.
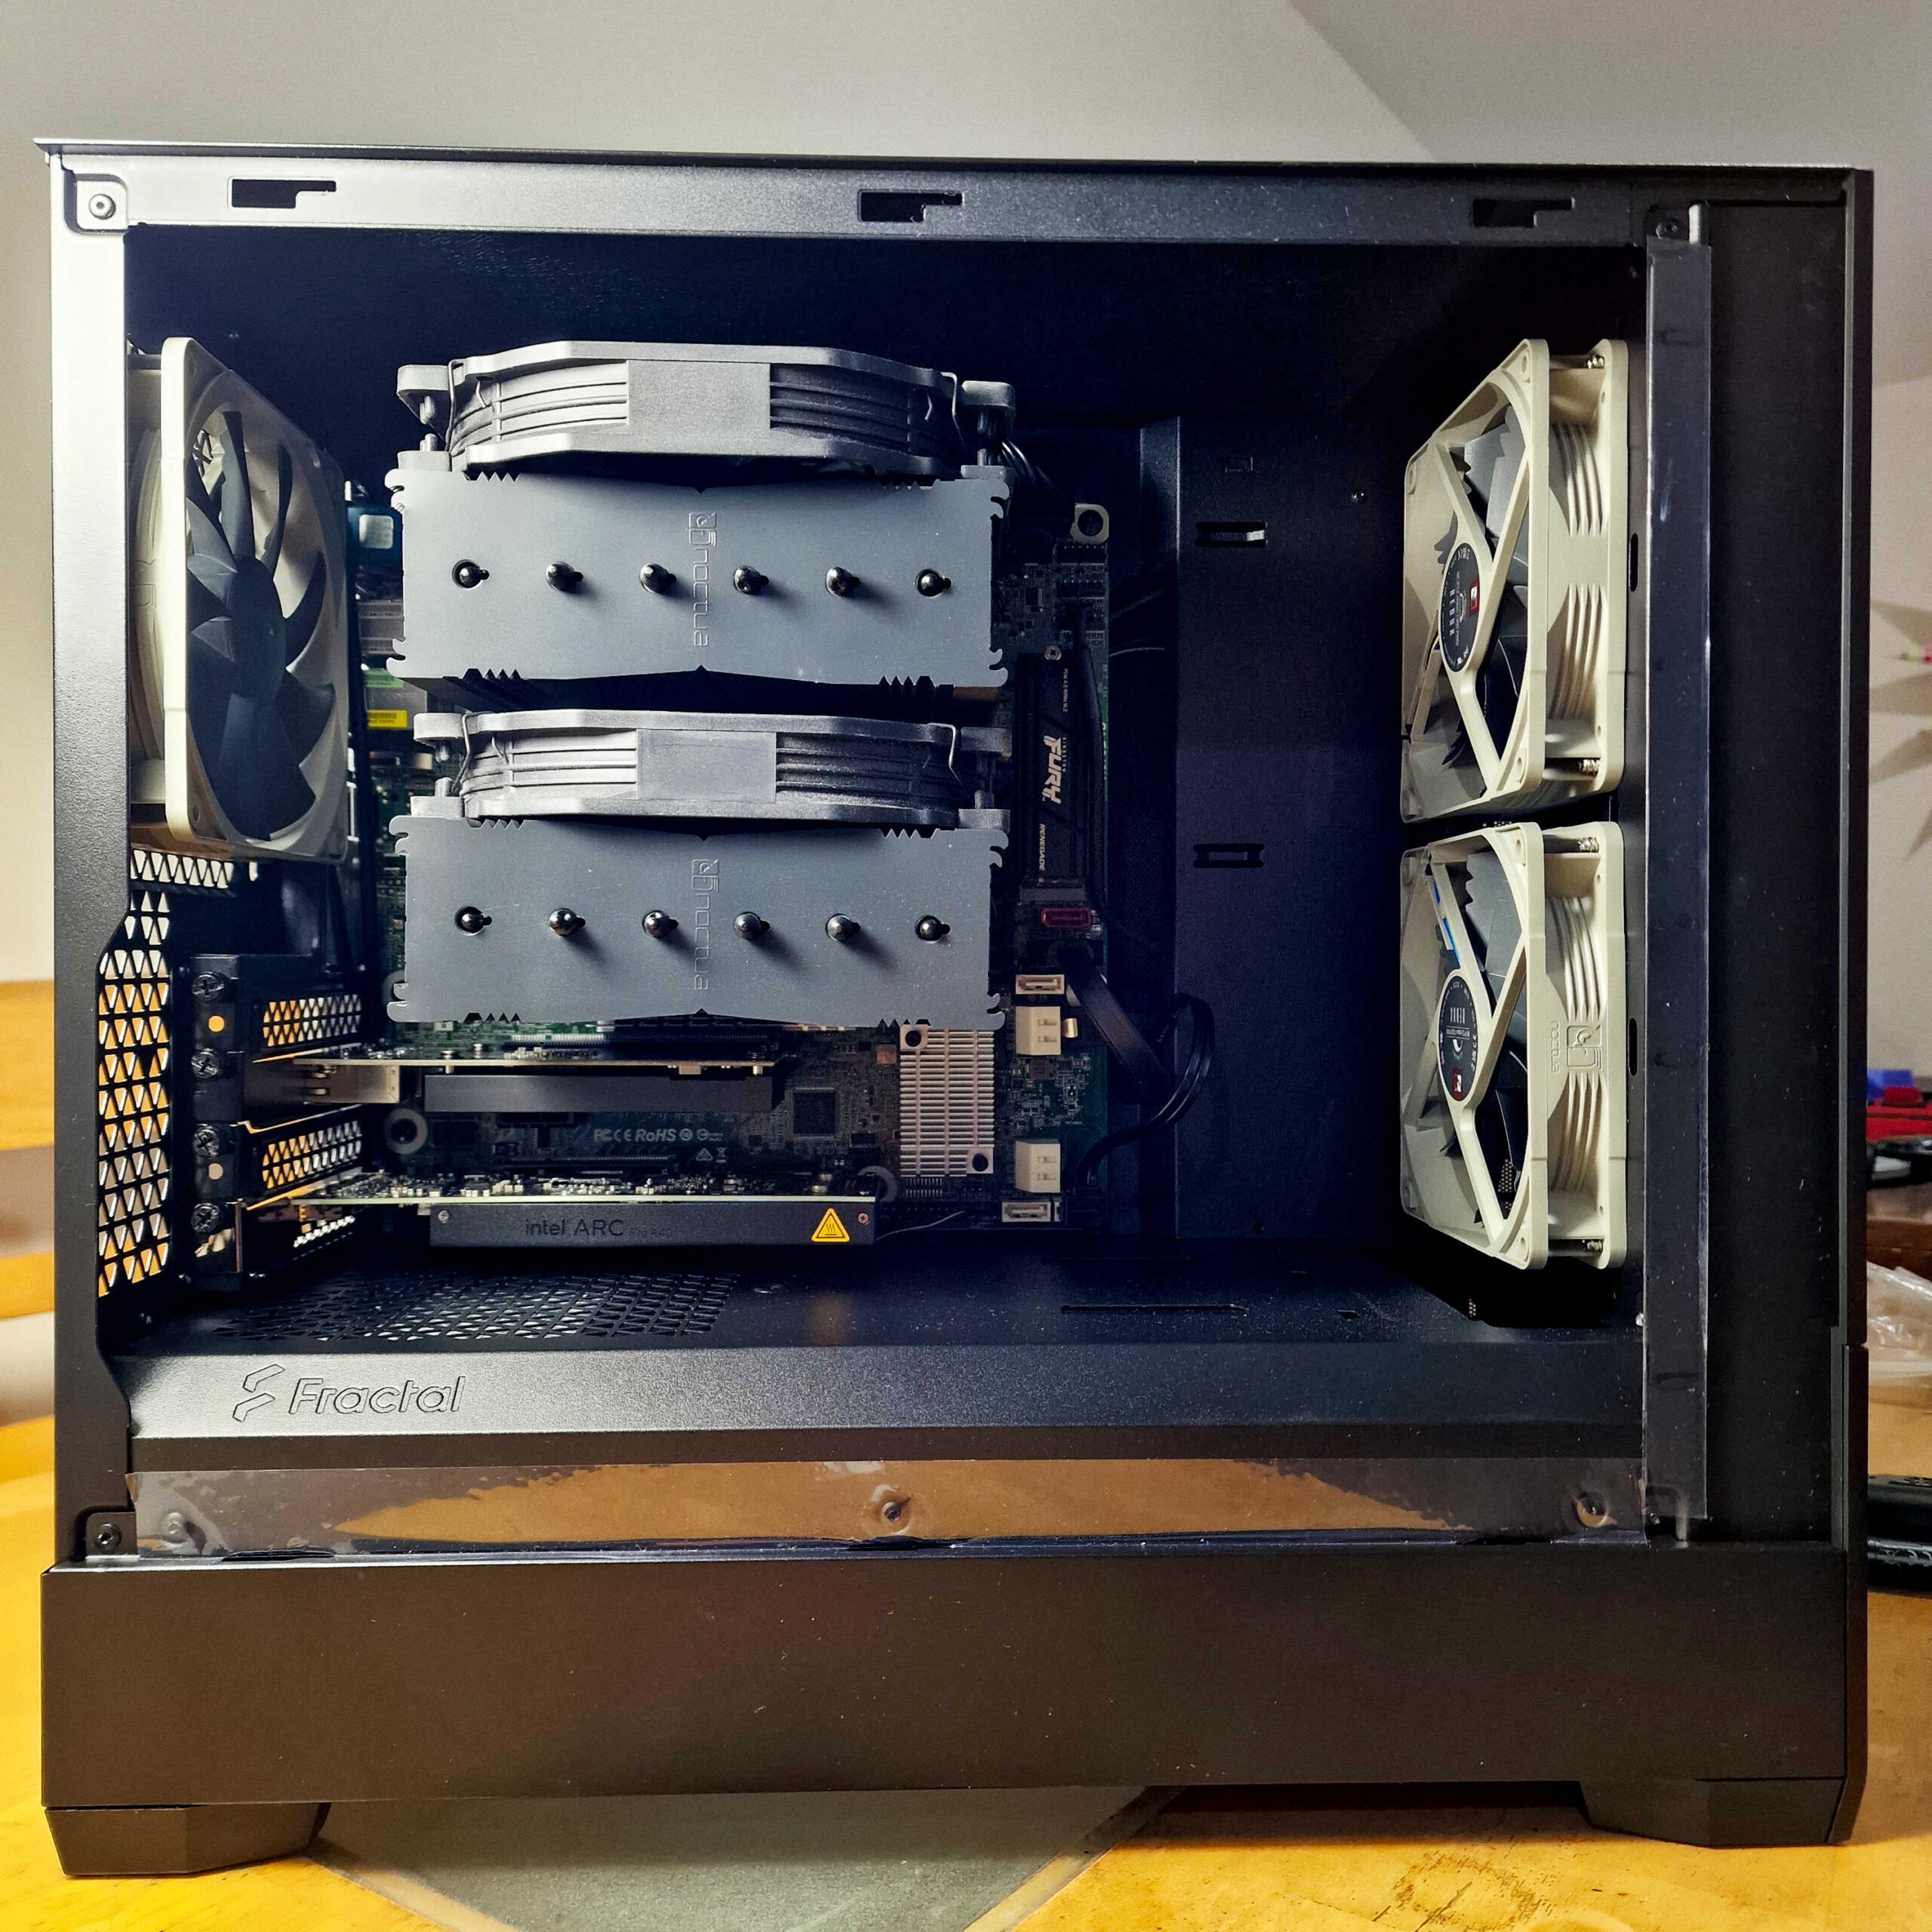
Server Build: Hardware Overview
My goal was to build a reliable, server-grade machine without overspending. While many homelabbers use spare desktops or laptops, I built a compact but powerful server from scratch.
Core Components:
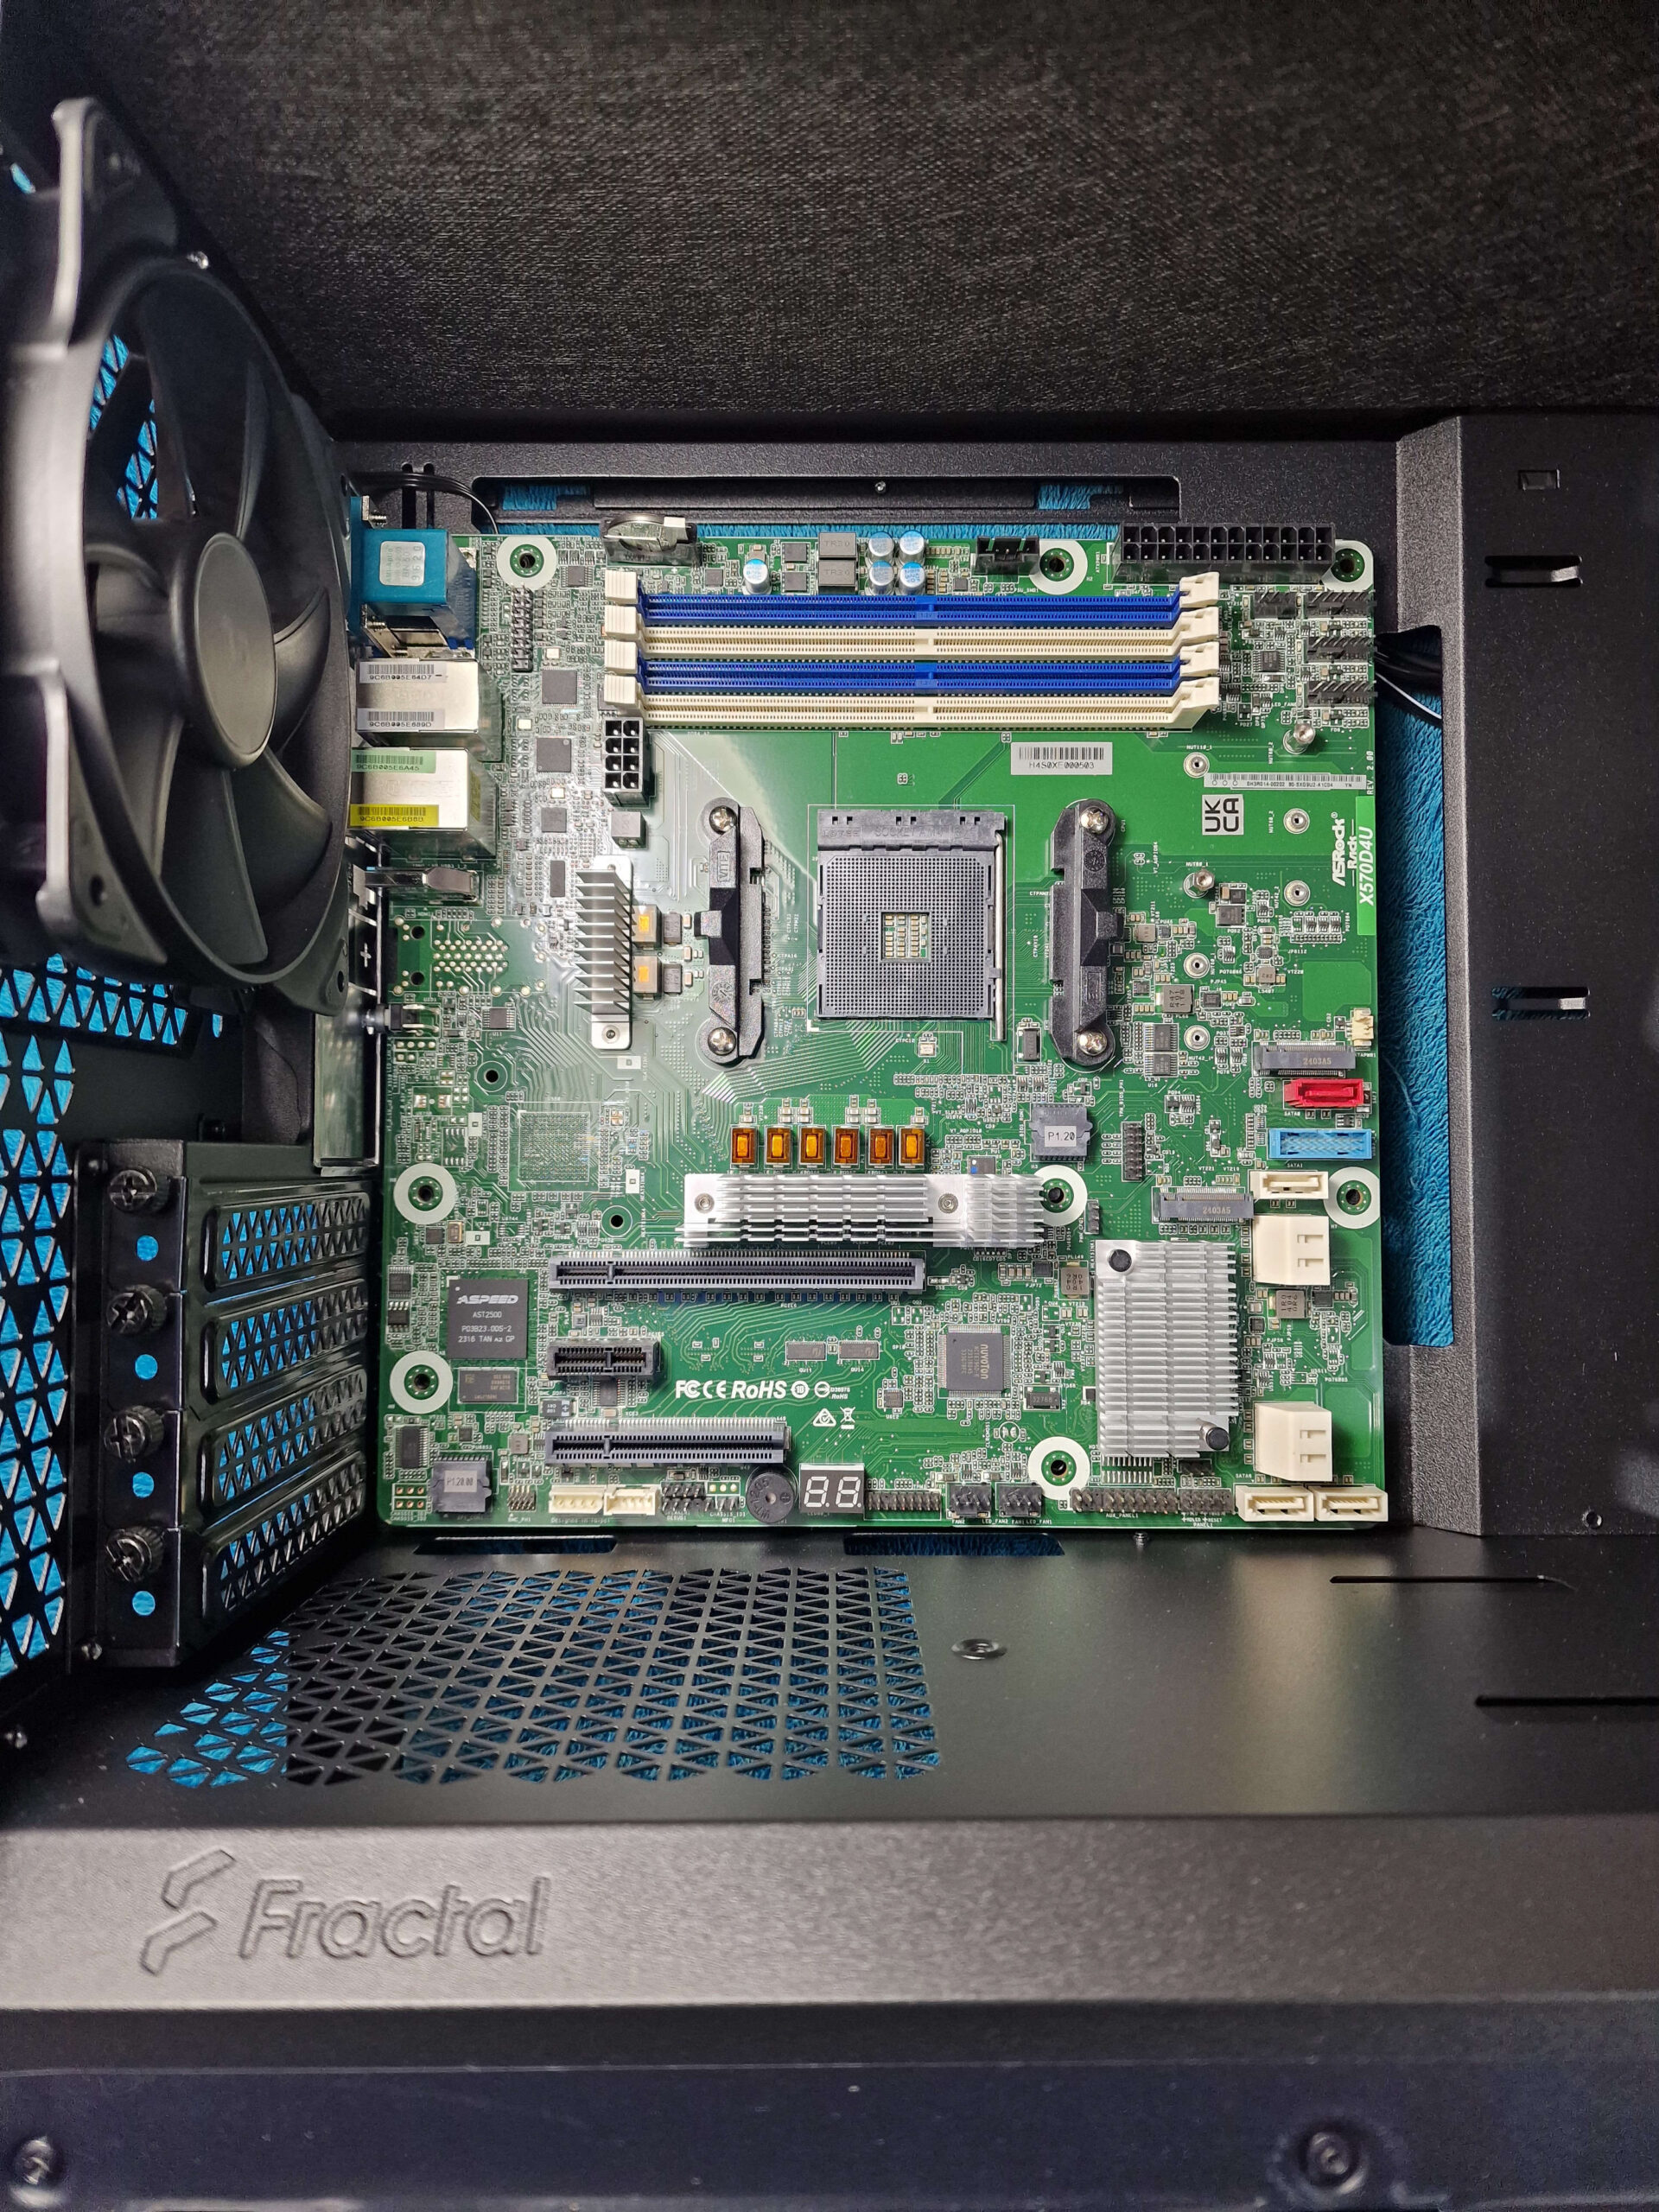
- Motherboard: ASRock Rack X570D4U (ECC support, AM4 socket)
- CPU: AMD Ryzen 7 5700X (8 cores, 65W TDP)
- RAM: 64GB Micron DDR4 3200MHz ECC UDIMM (2x32GB)
- PSU: Corsair RM Series 650w 80+ Gold Fully Modular
- Case: Fractal Pop Mini Silent (Black)
- CPU Cooler: Noctua NH-D15 chromax.black (high-performance, fits perfectly in the case)
Storage Setup
OS Storage:
- Drives: 2x 250GB SSDs (Samsung 870 EVO + Crucial MX500)
- Configuration: ZFS RAID 1 (Mirror) for redundancy
VM and Container Storage:
- Drives: 2x 1TB NVMe SSDs (Kingston FURY Renegade + Corsair MP600 PRO XT)
- Configuration: ZFS Mirror for redundancy and performance
Note: RAID is not a backup solution. I plan to implement a dedicated Proxmox Backup Server or NAS in the future for actual data backups.
Networking Infrastructure
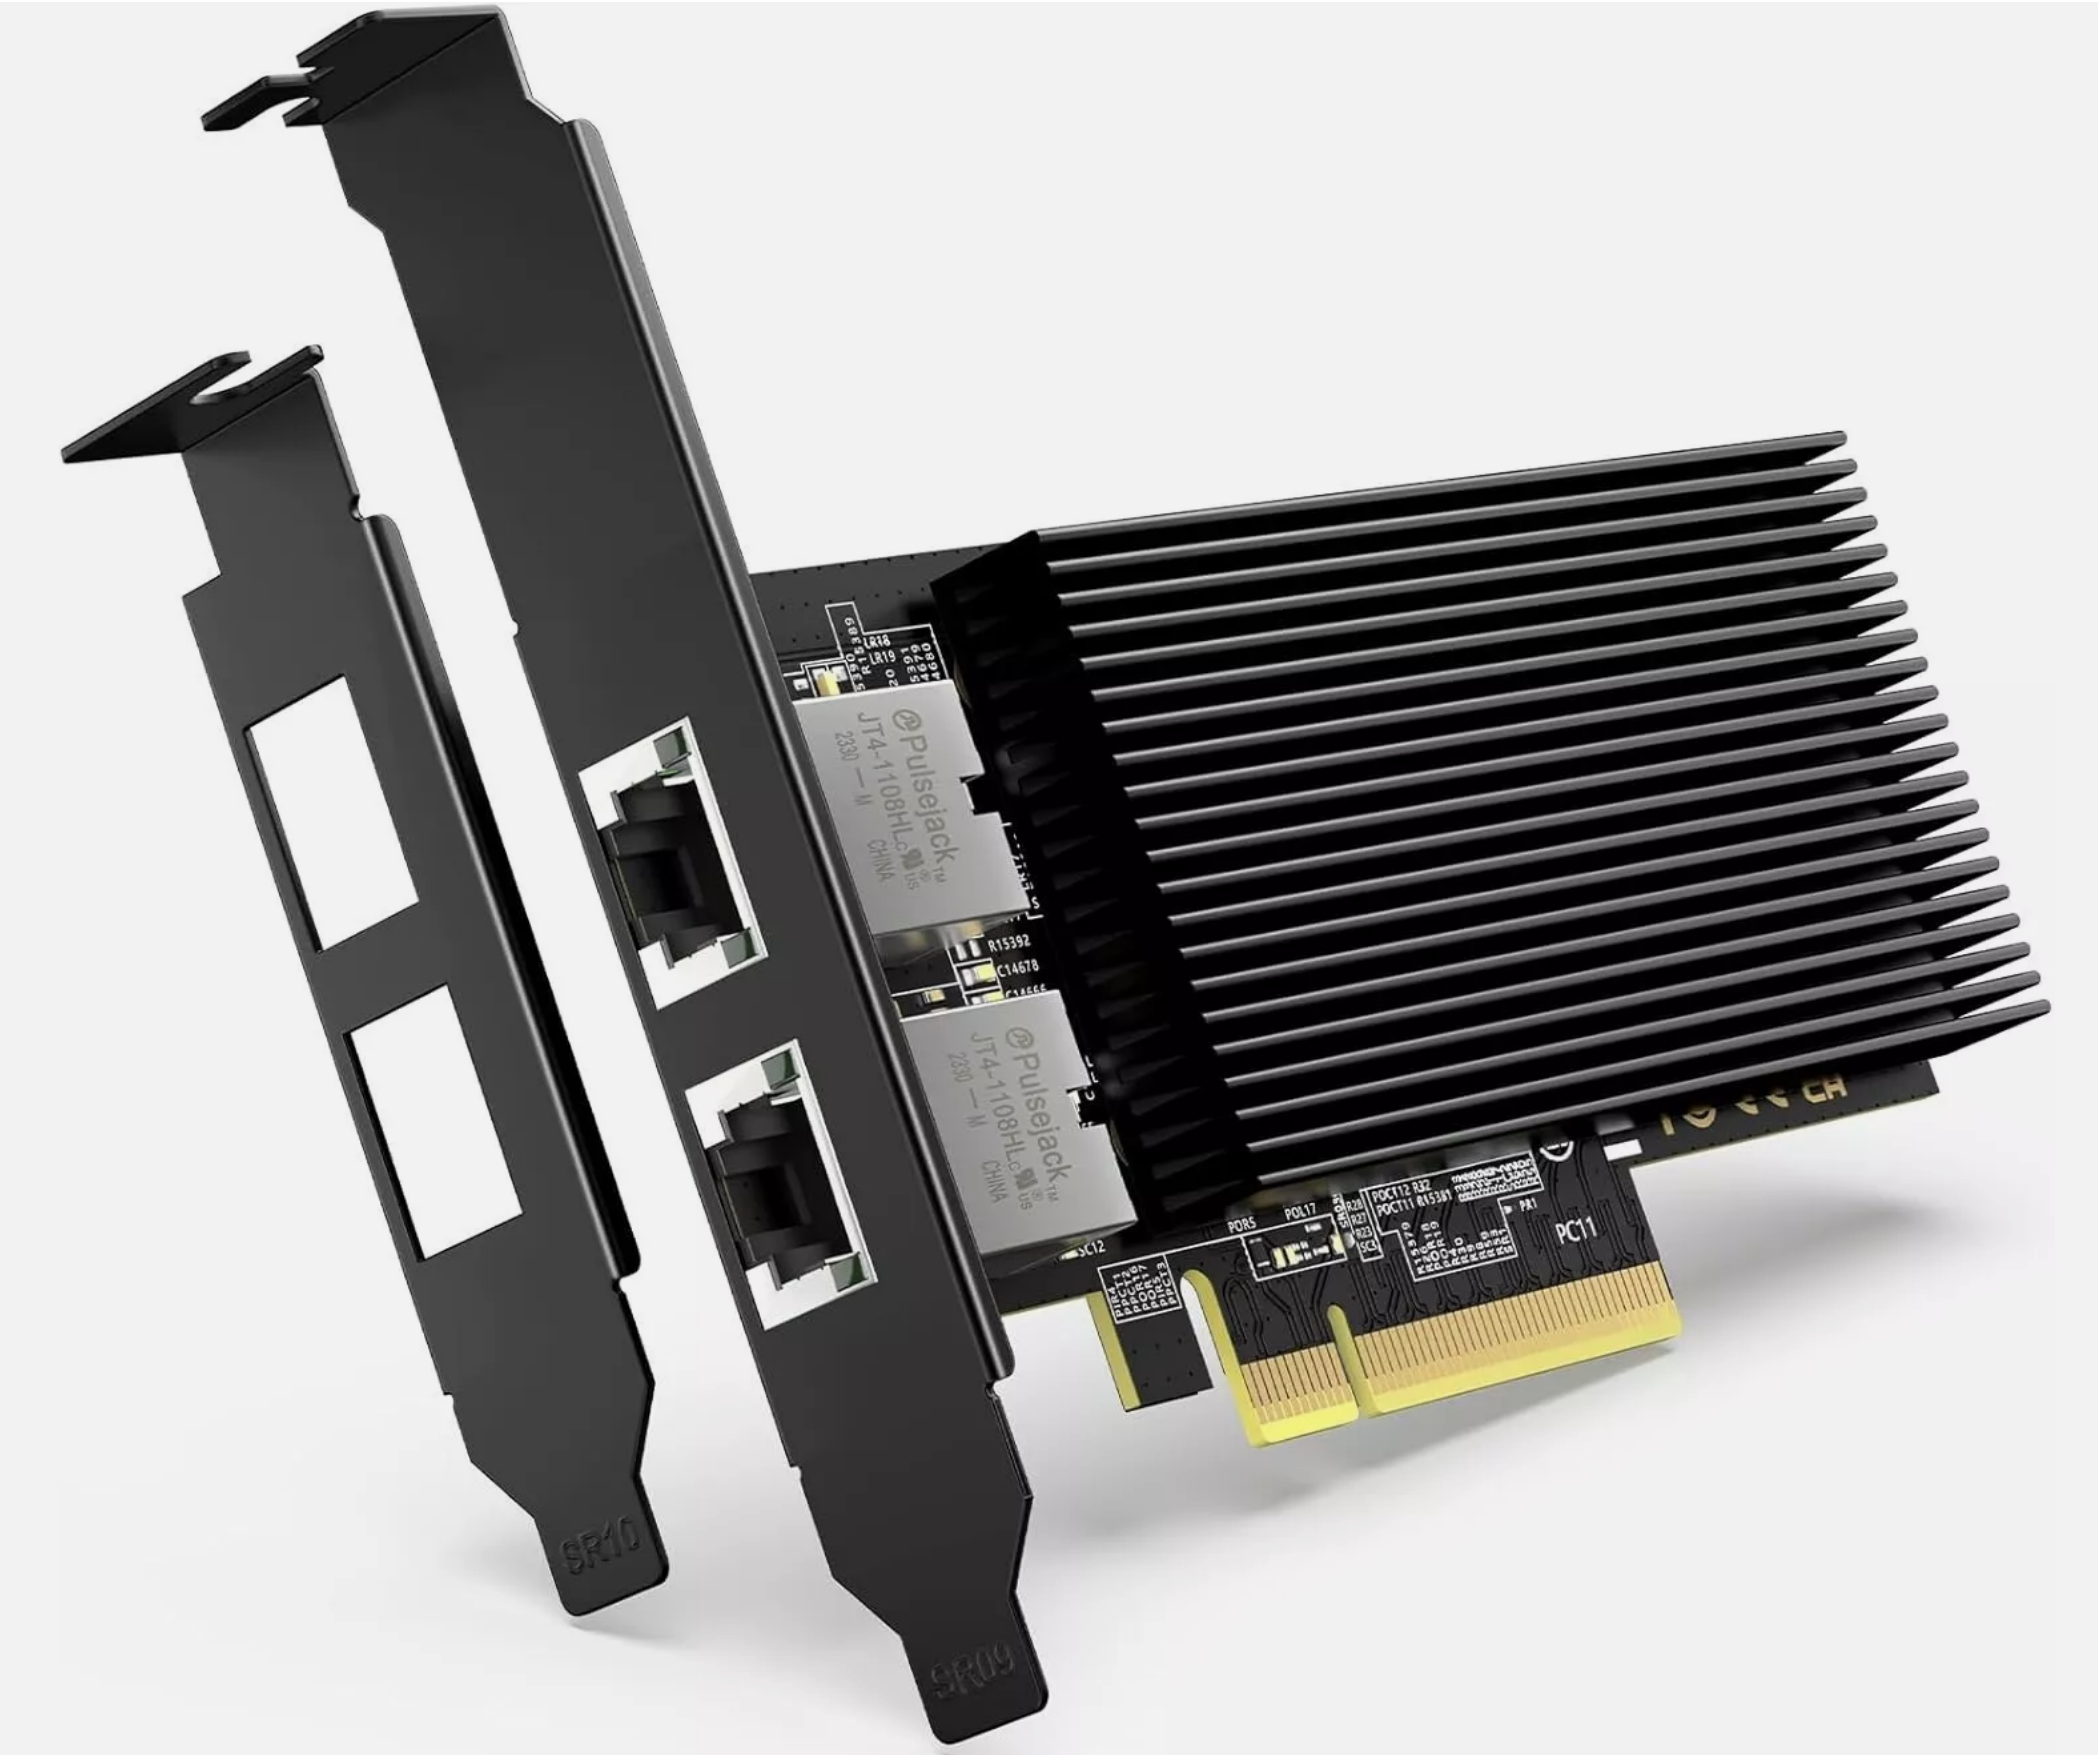
I wanted 10 Gb networking to ensure high-speed data transfer between my Proxmox server and workstation. I balanced performance with cost since enterprise 10 Gb switches can be expensive.
Networking Hardware:
- NIC: Dual LAN SFP+ PCI-e Card (Intel 82599/X520-DA2 Controller)
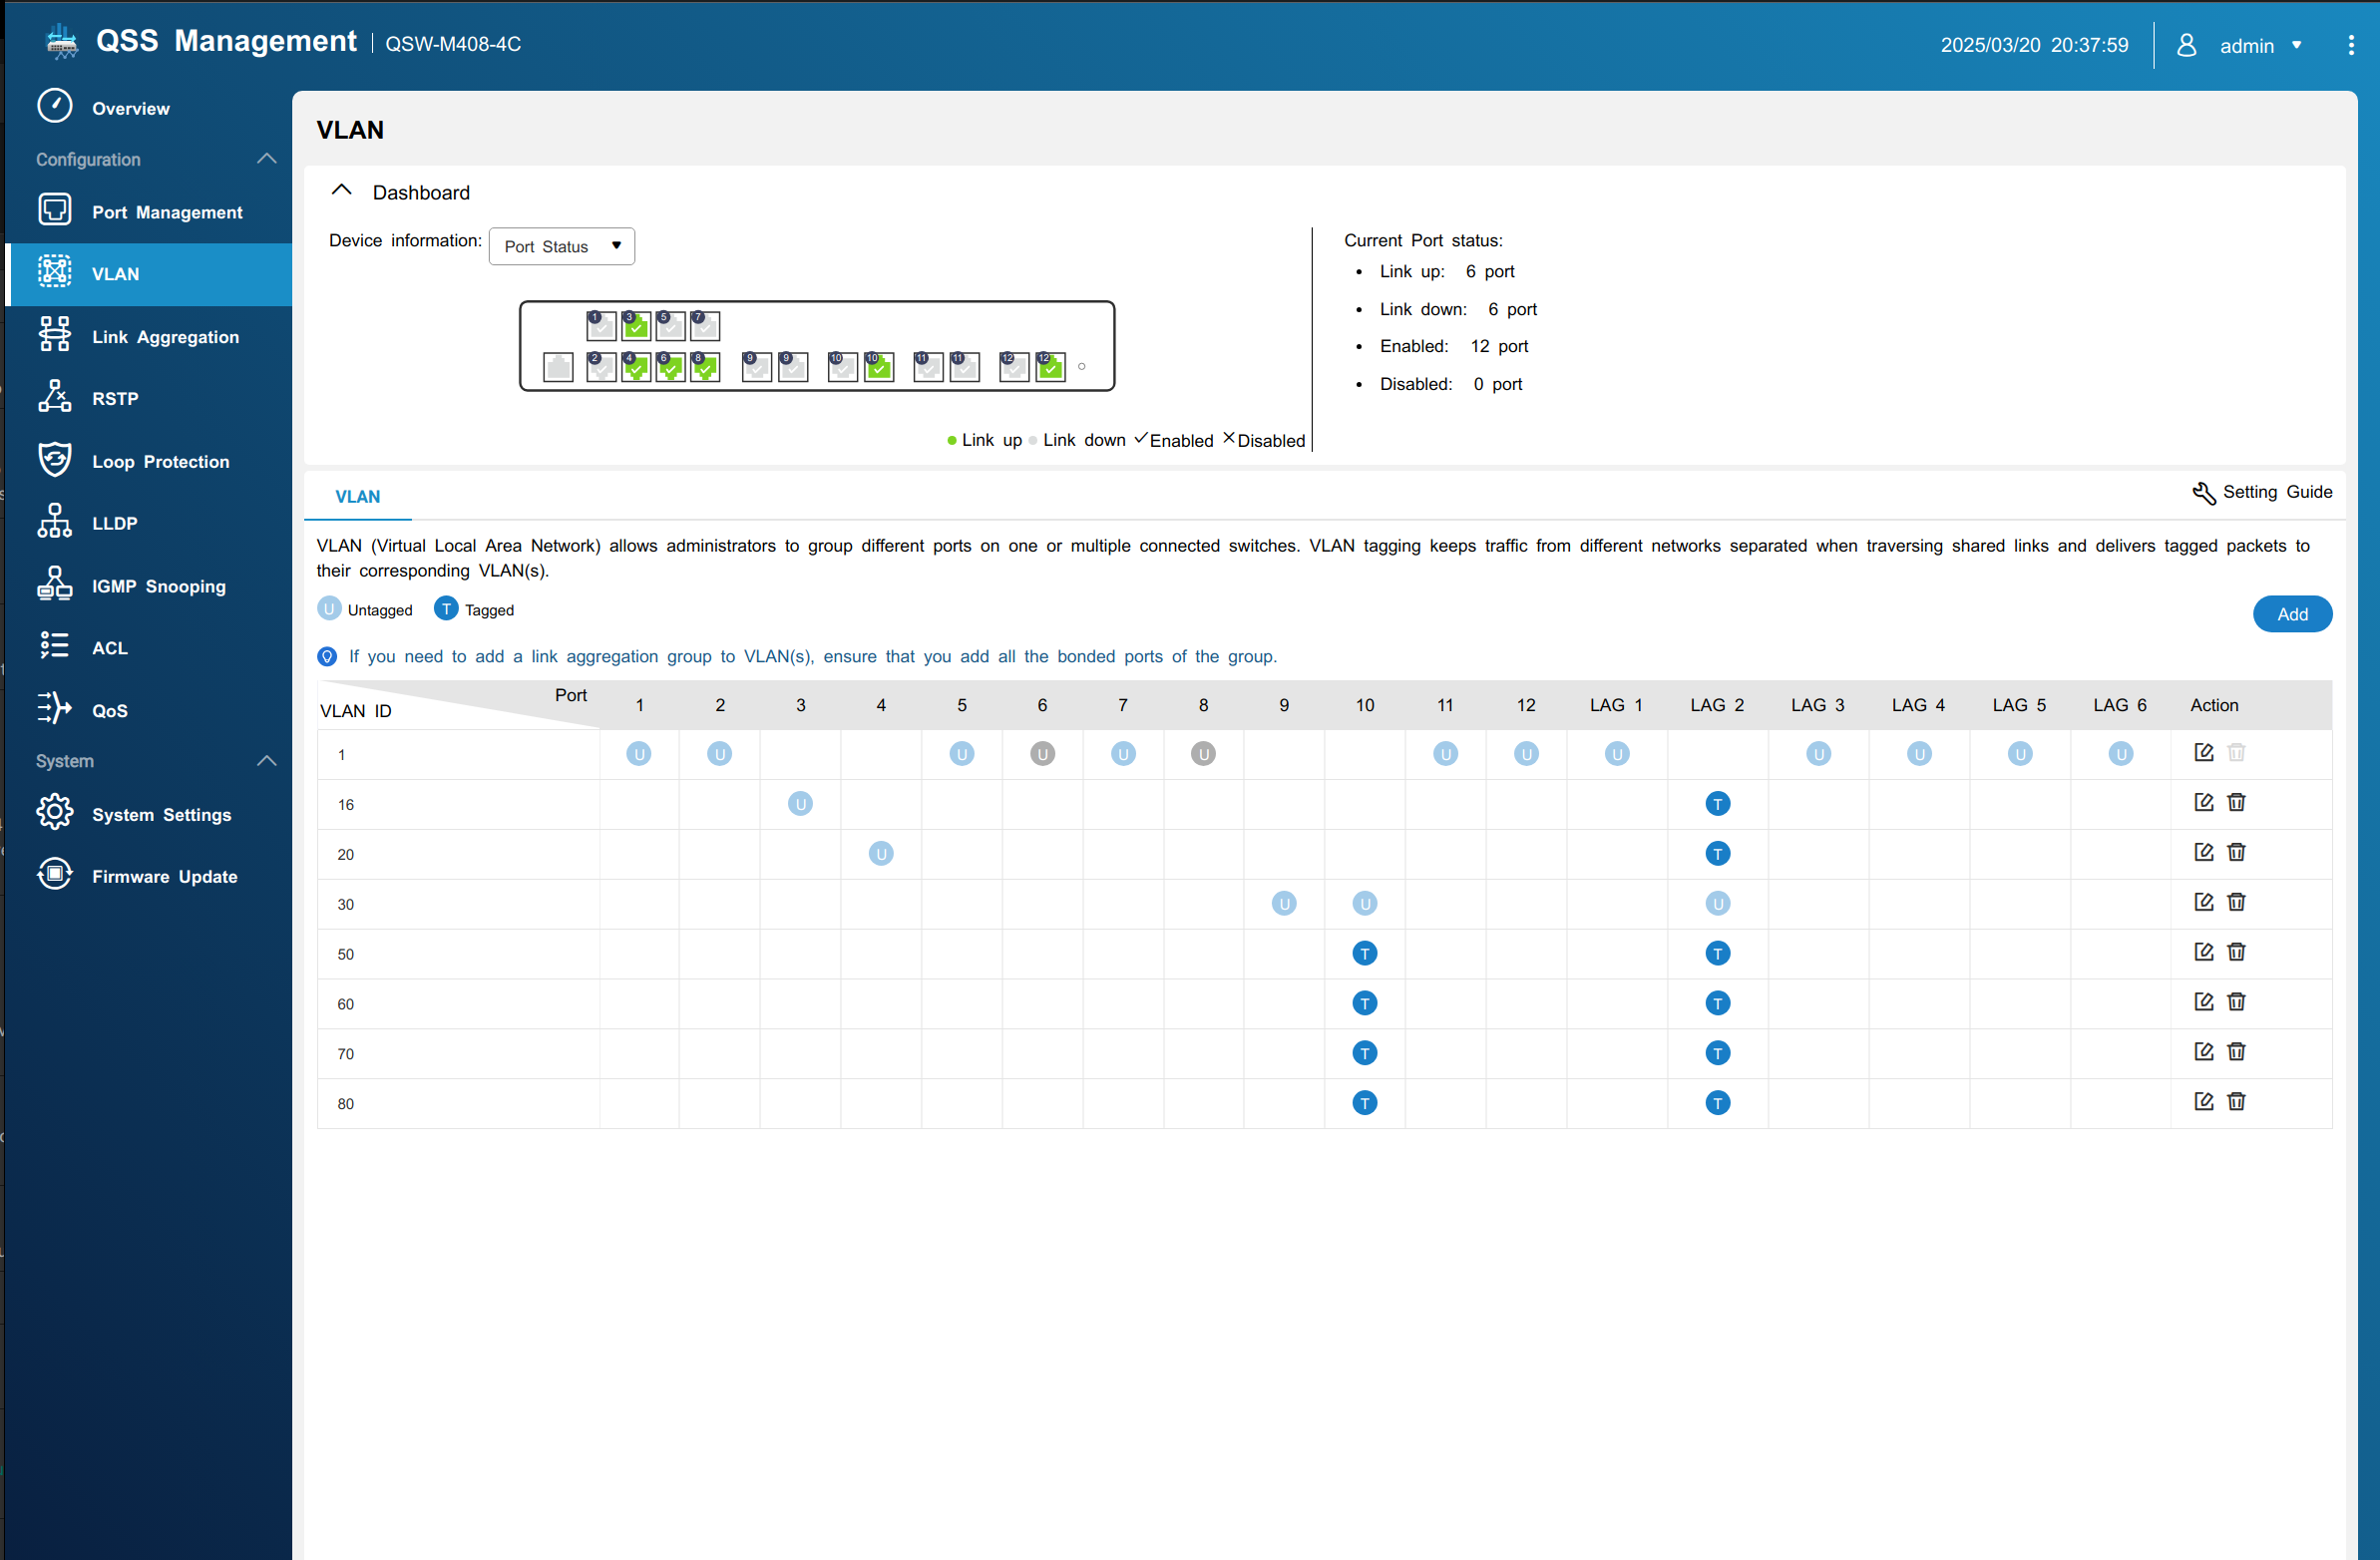
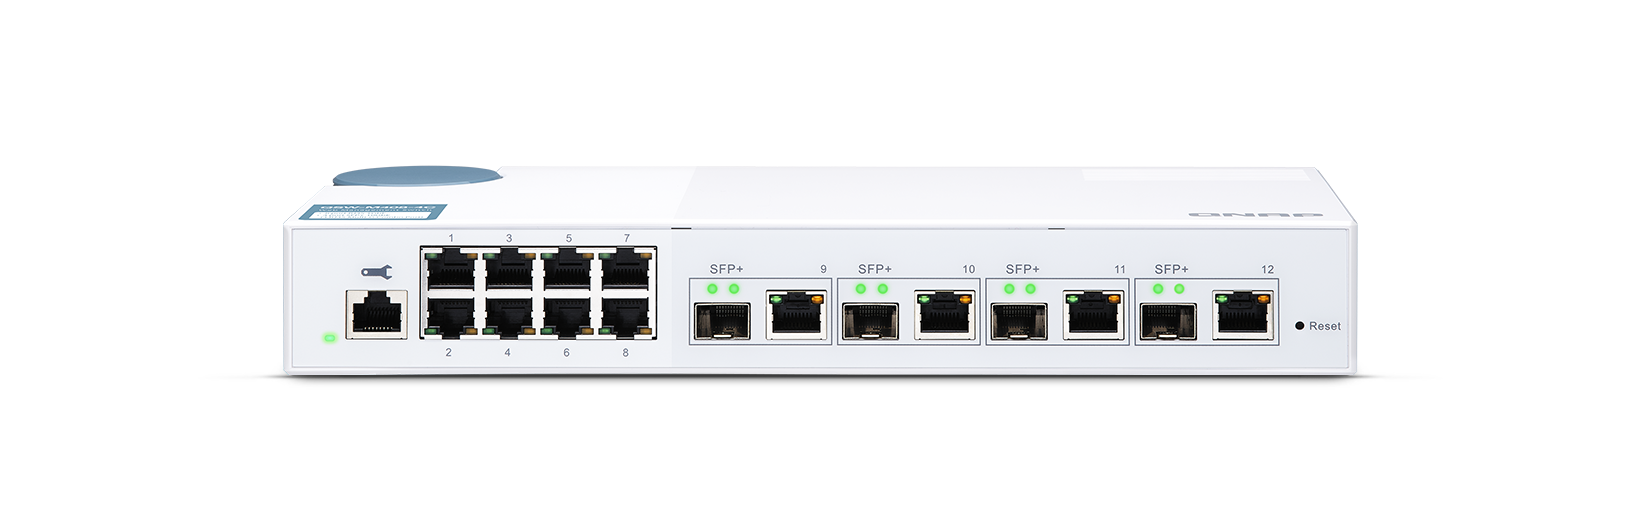
- Switch: QNAP QSW-M408-4C 10GbE Layer 2 Managed Switch (supports VLANs, LAGG, user-friendly UI)
This setup allowed me to create VLANs and Link Aggregation Groups (LAGG) while maintaining high-speed connectivity. I’ll detail the switch configuration and VLAN setup in future write-ups.
GPU for AI and Media Workloads
Interested in experimenting with small-scale AI workloads and GPU virtualisation (IOMMU passthrough), I added:
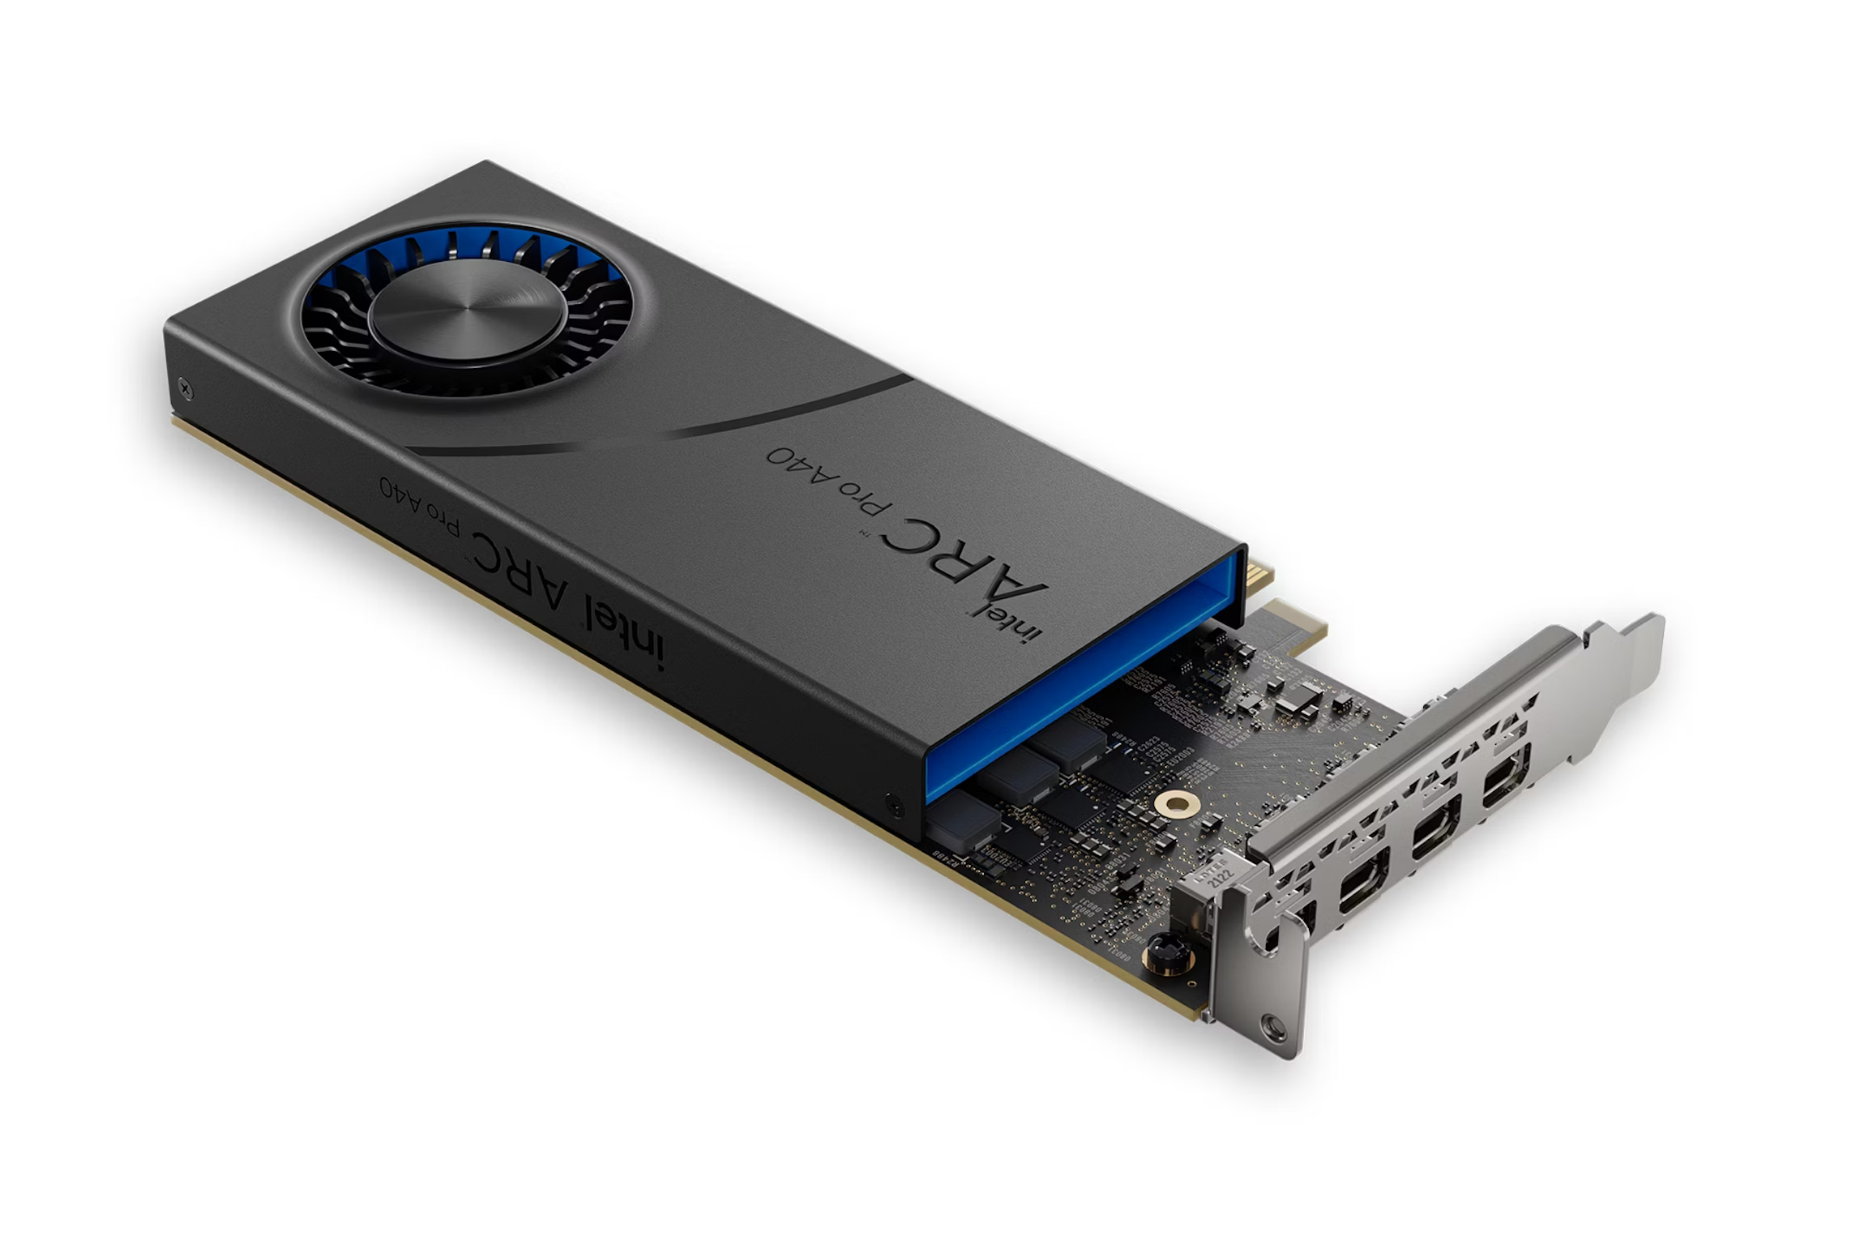
Intel ARC PRO A40 GPU (6GB GDDR6) – A cost-effective, entry-level workstation GPU suitable for initial AI exploration, virtualisation testing, and media transcoding. If needed, it can be upgraded easily in the future for heavier workloads.
GPU:
- Intel ARC PRO A40 6GB GDDR6
- Supports Ray Tracing and AI workloads
- Can be passed to VMs or Containers via IOMMU passthrough in Proxmox
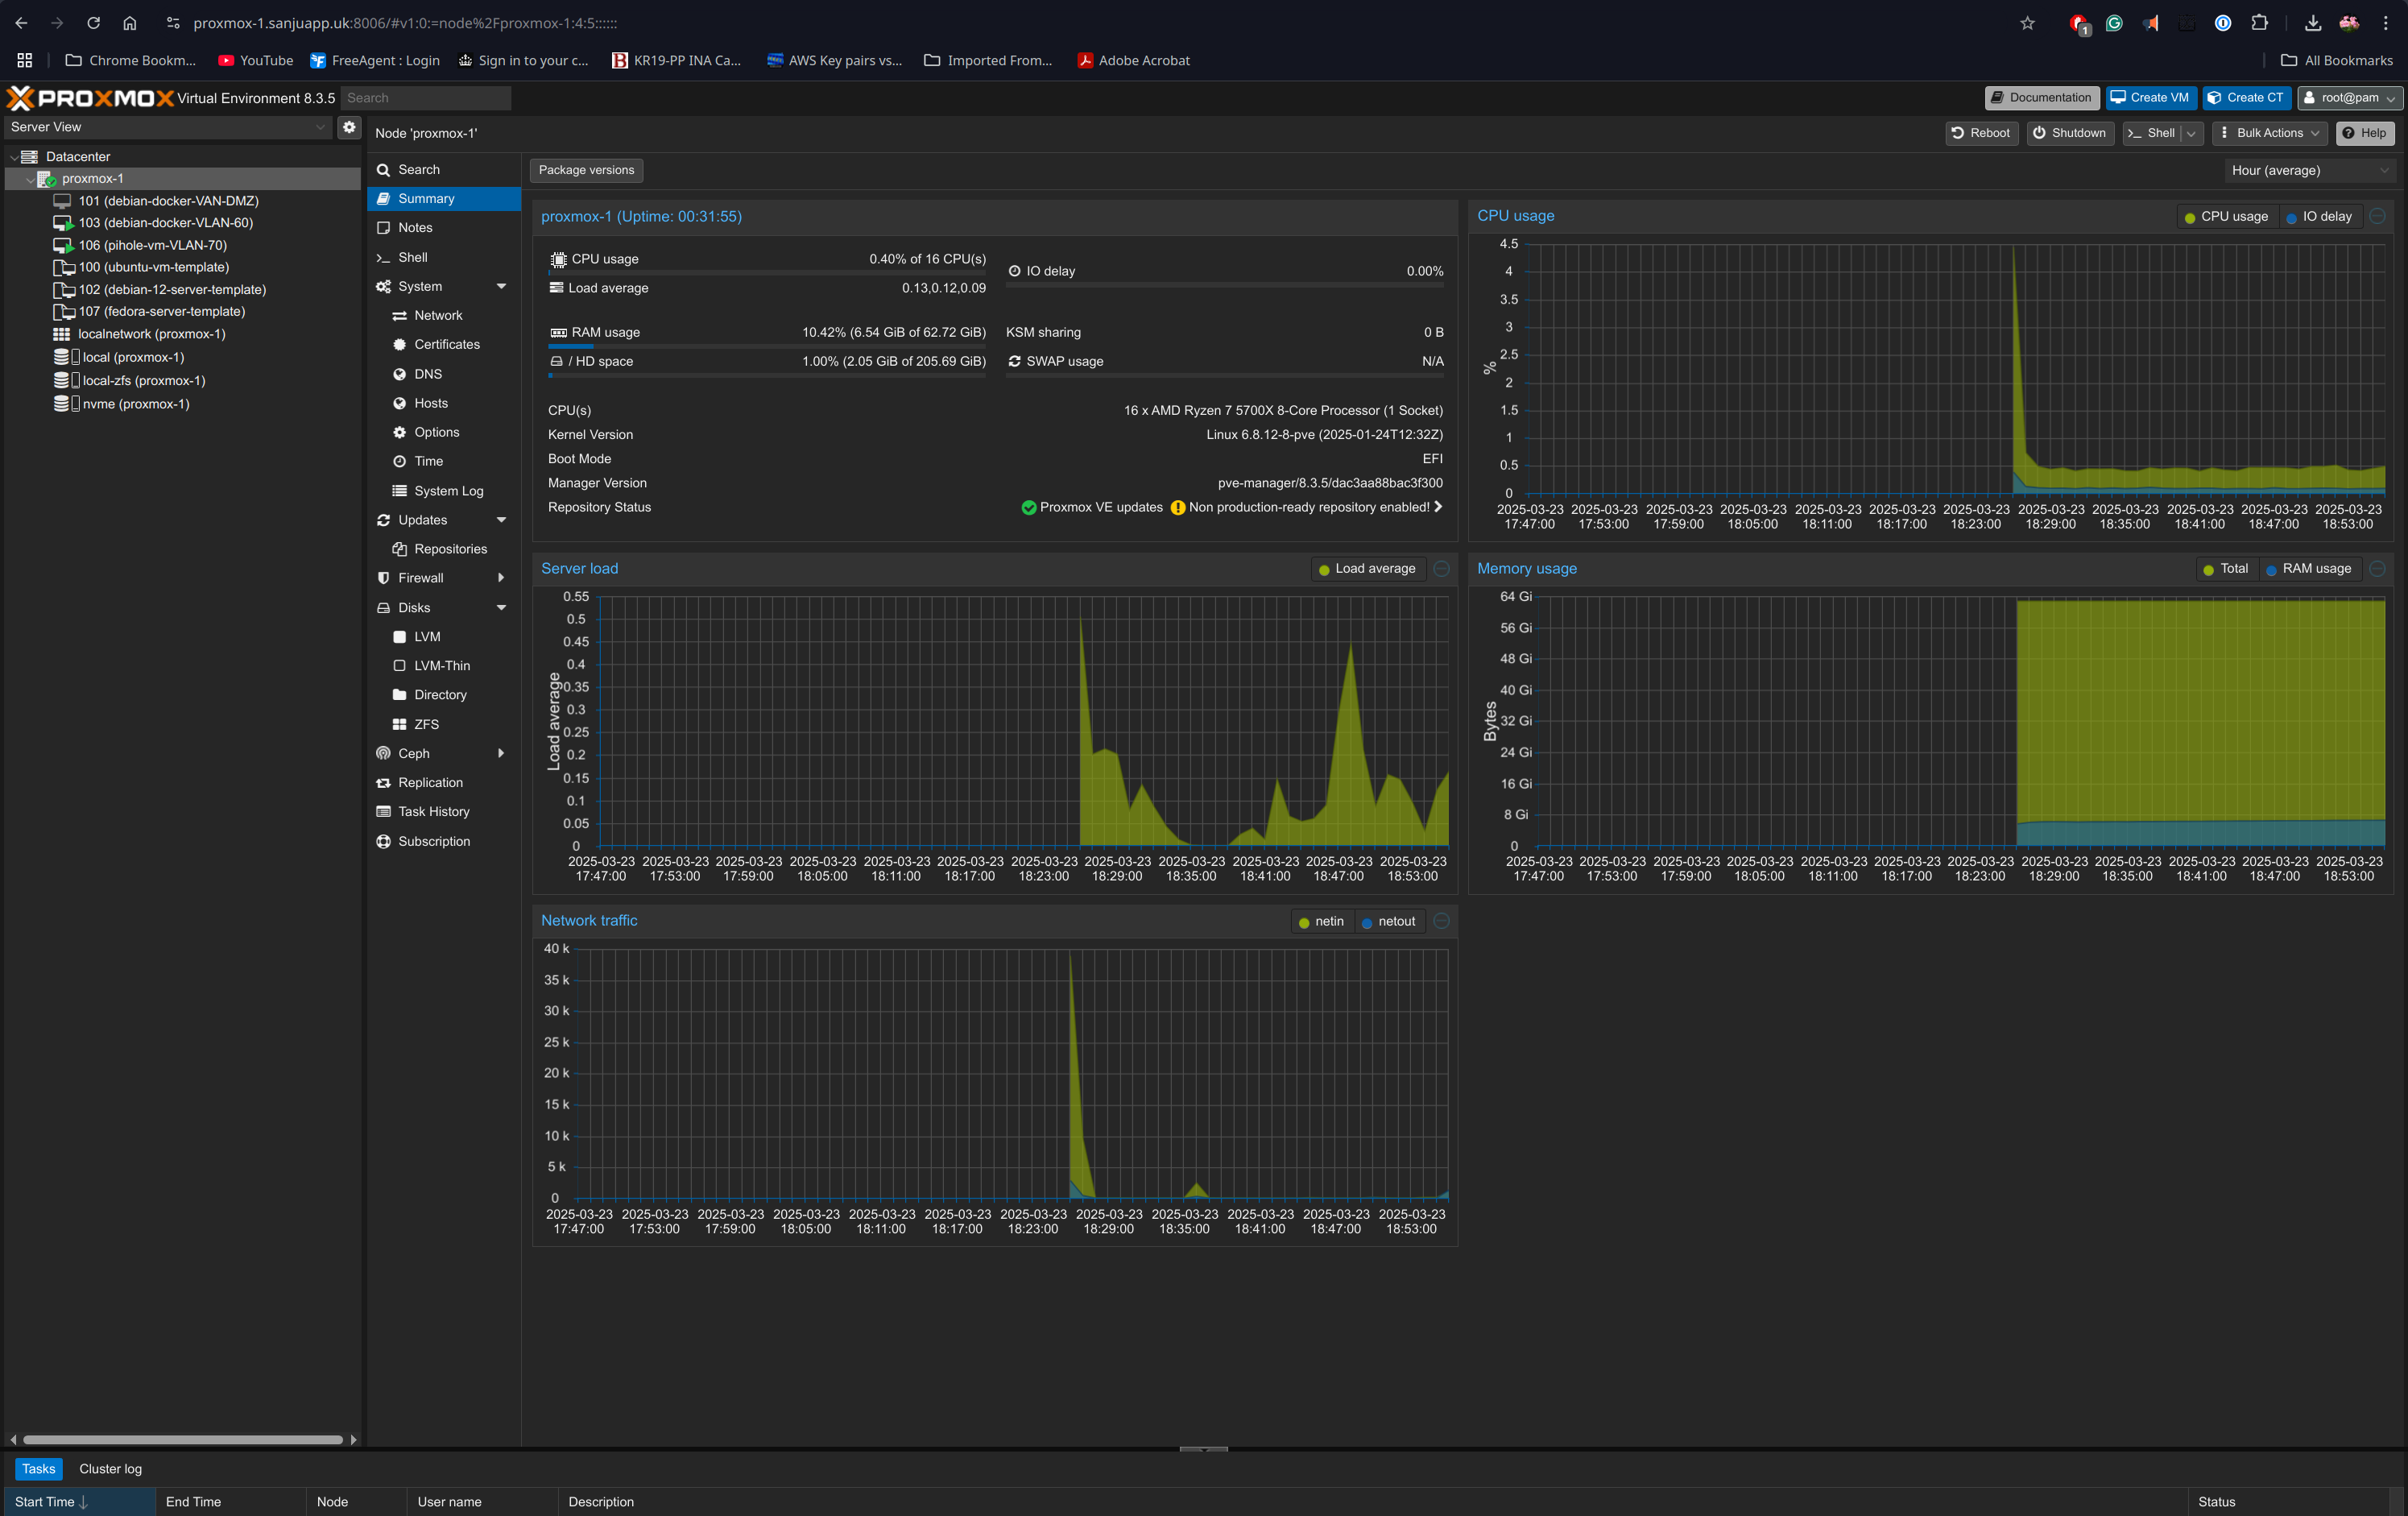
Virtualisation Platform: Proxmox VE
For the hypervisor, I chose Proxmox VE, a powerful, open-source virtualisation platform based on Debian 12 Bookworm.
Key Features Used:
- Support for VMs and LXC Containers
- ZFS for robust storage management
- IOMMU passthrough for GPU and PCIe devices
- Snapshots and backup tools
Proxmox has been excellent for managing multiple environments and learning enterprise-grade virtualisation.
Lessons Learned:
Building and configuring this homelab taught me significantly more than I initially expected. Some highlights include:
- Proxmox VE Management: Setting up ZFS storage pools, optimising VM and container performance, and GPU passthrough using IOMMU.
- Advanced Networking: VLAN segmentation, subnetting, firewall rules, DHCP/DNS management, and routing via pfSense.
- Container Orchestration & Linux: Gained practical experience using Docker and Podman, including container networking and storage management.
- Hardware Selection & Assembly: Learned to select compatible, reliable components resembling enterprise-grade solutions, balancing cost and performance.
Future Plans and Learning Goals
- Set up a Proxmox Backup Server or Truenas for proper backups
- Configure reverse proxy with SSL (e.g., Nginx Proxy Manager or Traefik)
- Explore Kubernetes using K3s or MicroK8s for lightweight deployments
- Deploy Grafana + Prometheus for monitoring and visualisation
- Experiment with larger AI workloads and possibly upgrade GPU
Documentation & Further Learning:
I plan to publish additional articles detailing the configuration steps, best practices, and lessons learned from each aspect of my homelab:
- VLAN and pfSense configuration guides.
- Proxmox setup and optimisation tutorials.
- Kubernetes deployment and container orchestration strategies.
- GPU virtualisation and AI workload walkthroughs.
Conclusion
Building this homelab has been one of the most rewarding learning experiences. From networking to containerisation and virtualisation, I now have a deeper understanding of enterprise technologies and practical skills that I use daily. I plan to write detailed articles about each component of this homelab to help others who want to embark on a similar journey.